Workflow user guide
This user guide will provide everything you need to know about how to configure, implement and optimize complex payment workflows using our low code UI workflow designer available through Composer.
You can use Workflows to easily define which payment gateway should receive your transactions with limited changes to our single API. Routing options that are currently available in Workflows include single (static) gateway routing, split volume routing, and conditional routing rules. We will be adding more supported configuration options in future releases!
- Single (static) gateway routing: Route your payments to a single gateway.
- Split volume gateway routing: Route your payments between 2 gateways by specifying the volume %.
- Conditional routing rules: Route your payments to a different gateway based on condition sets
Each Workflow is specific to a Spreedly Environment; however, an unlimited amount of workflows can be created within a given environment. Customers that have multiple environments should create workflows for each environment.
Permissions by role-based access control
To create and manage workflows, each role has a unique set of permissions.
- Administrator: Allows a user access to all roles which includes the ability to create, update, read, delete and update a workflow to default.
- Environment Manager: Limited access that includes read access to connections, workflows and transactions.
- Workflow Manager: Allows a user to create, modify and delete workflows. User has read access to environments, connections, and transactions.
View logging events for workflows in the Activity Log. This is currently accessible to users with the Administrator role.
How to create and manage workflows
- Login to yourSpreedly App using your credentials and navigate to the Composer page
Select Composer in the app navigation menu.
-
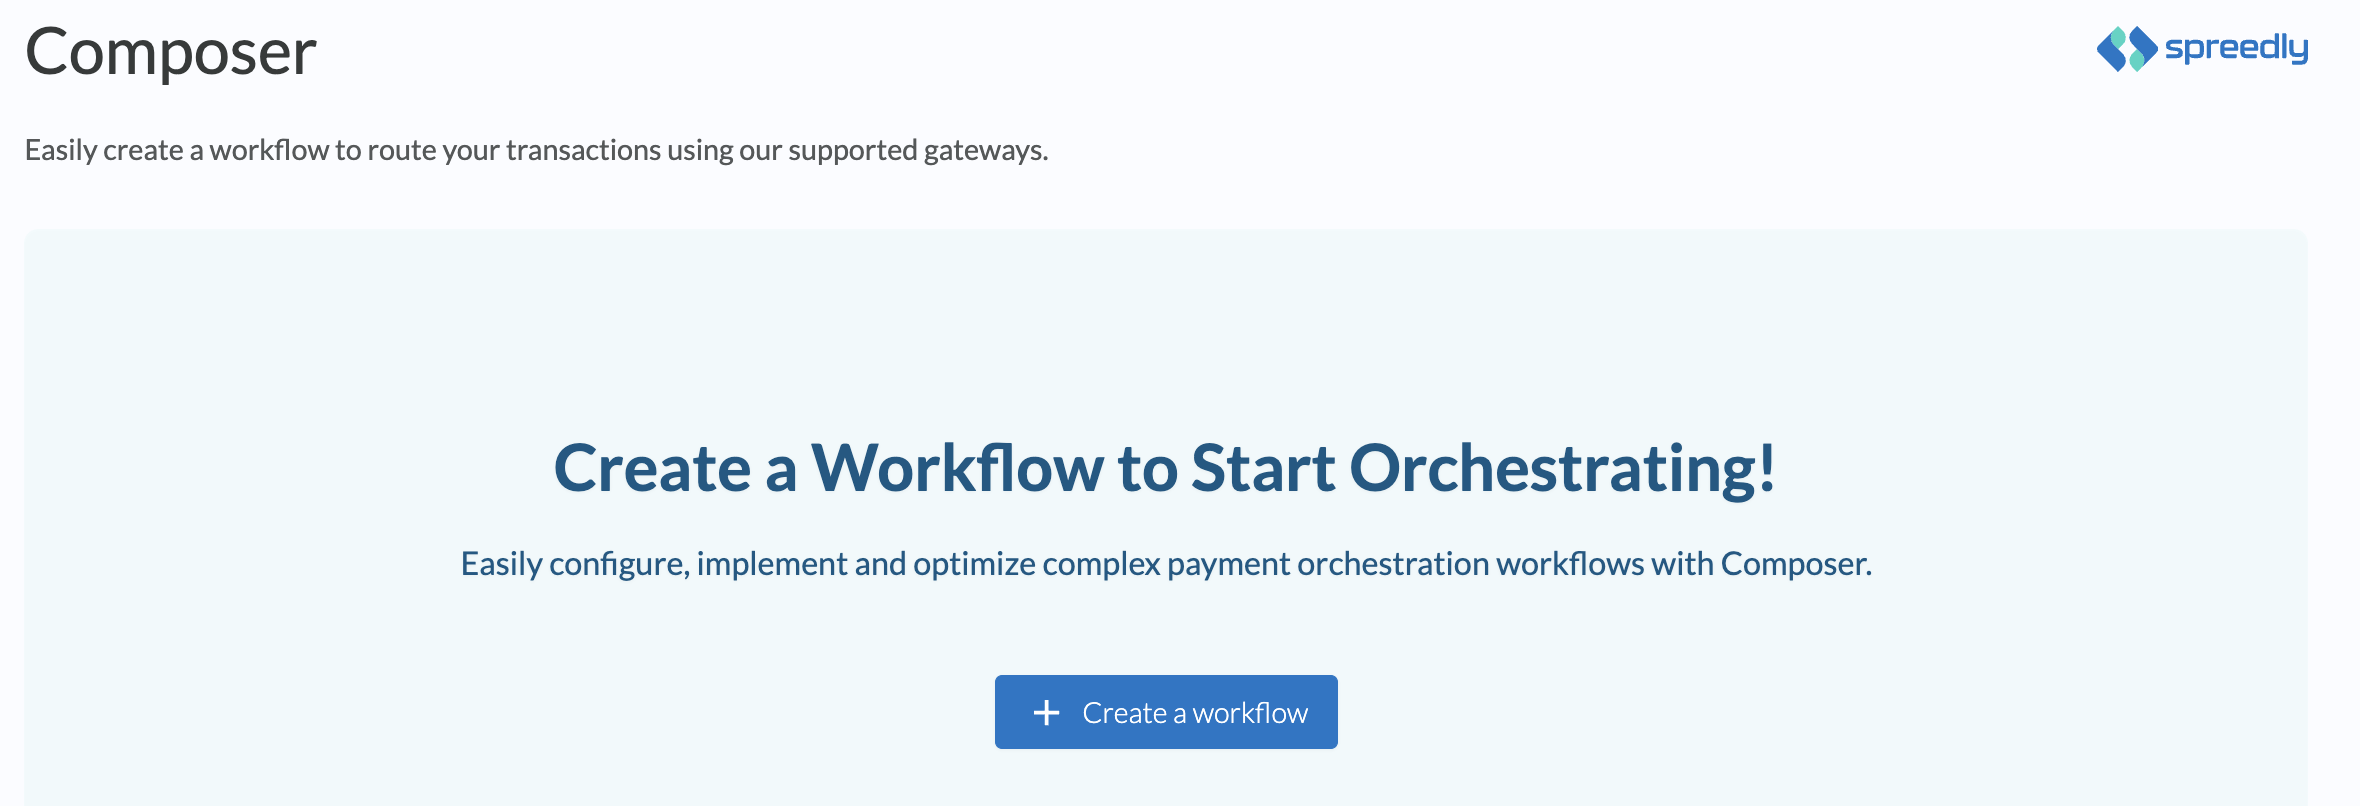
Create a new Workflow
-
Select Create a workflow on the Workflows page to navigate to the Workflow designer.
-
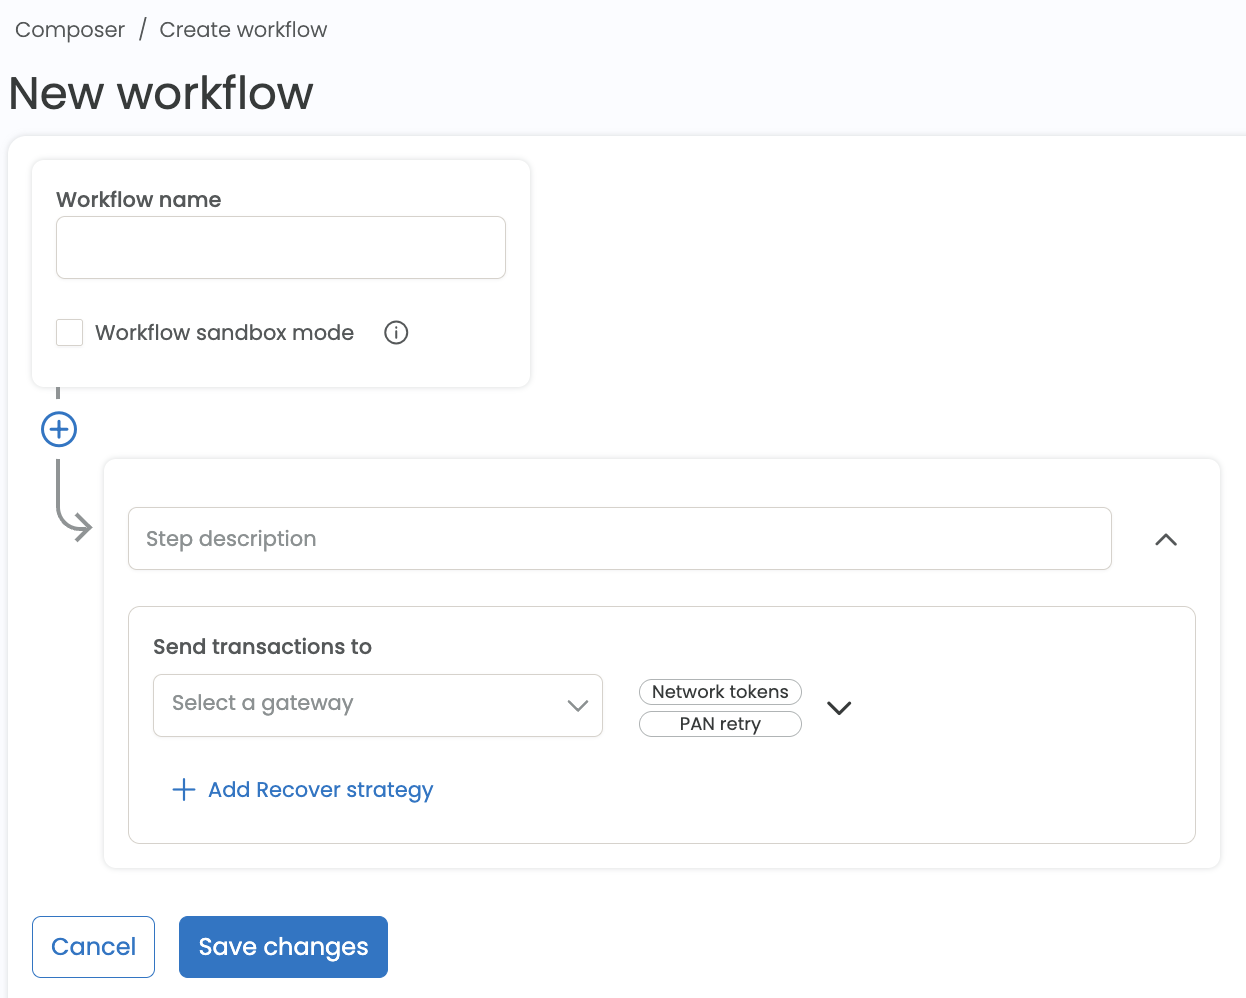
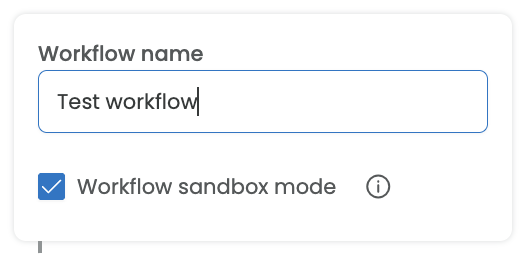
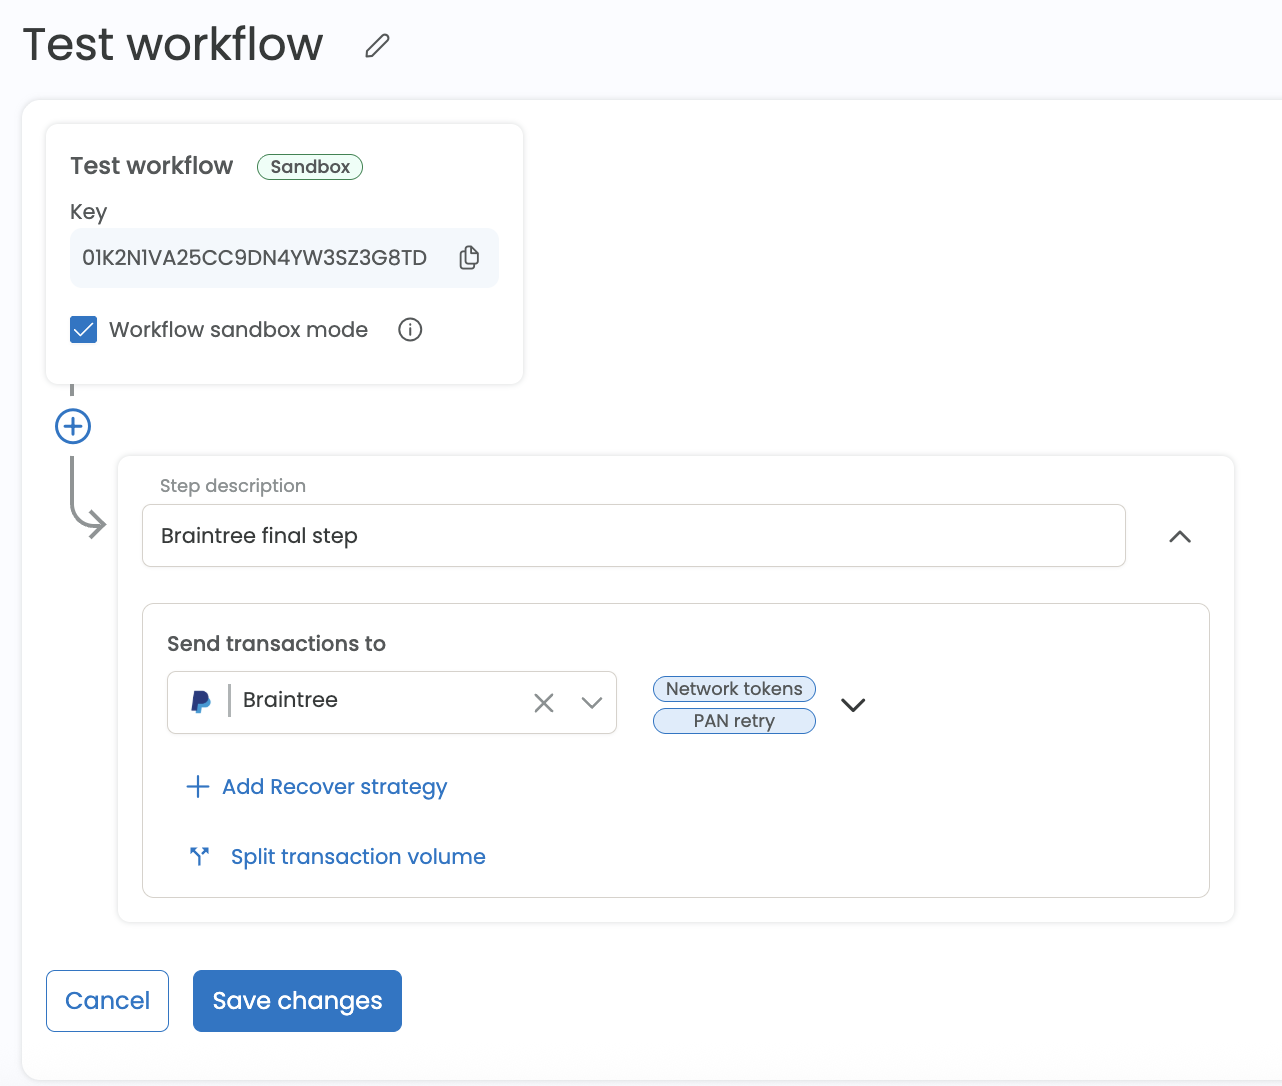
Create a Workflow name. This will be helpful for referencing your workflow within the app.
- Enable sandbox mode in order to test workflows using the sandbox gateways created in your environment. This mode can be used to test premium features that are otherwise unavailable on production gateways.
-
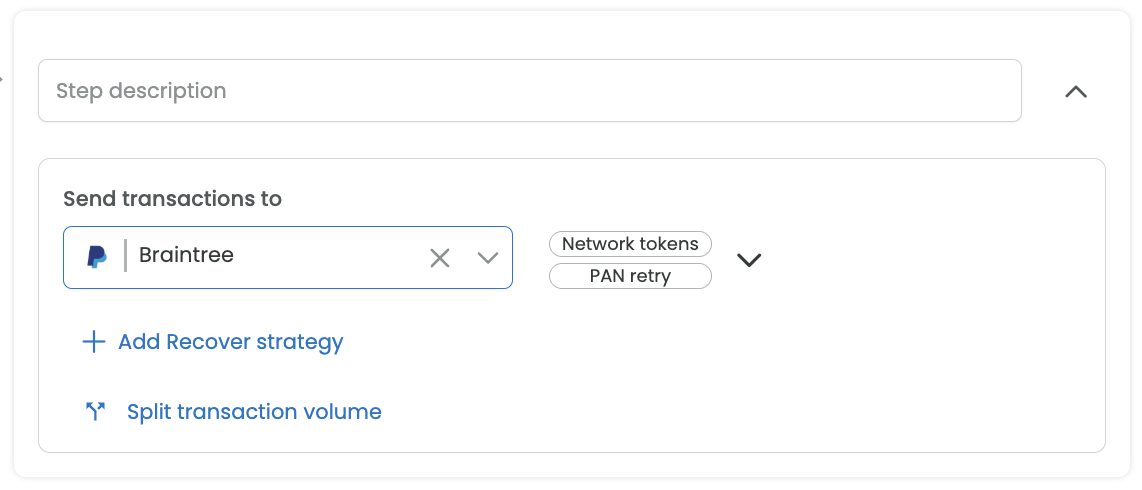
Select a gateway from the drop-down menu. Only Composer enabled gateways created within your environment will be available for selection. View the updated list here for more information. If only one gateway is selected, all transactions will be routed to this gateway. Optionally add a step description.
-
[optional] Select Split transaction volume to route your payments between two gateways. Update the split % to specify the volume allocation across the two gateways.
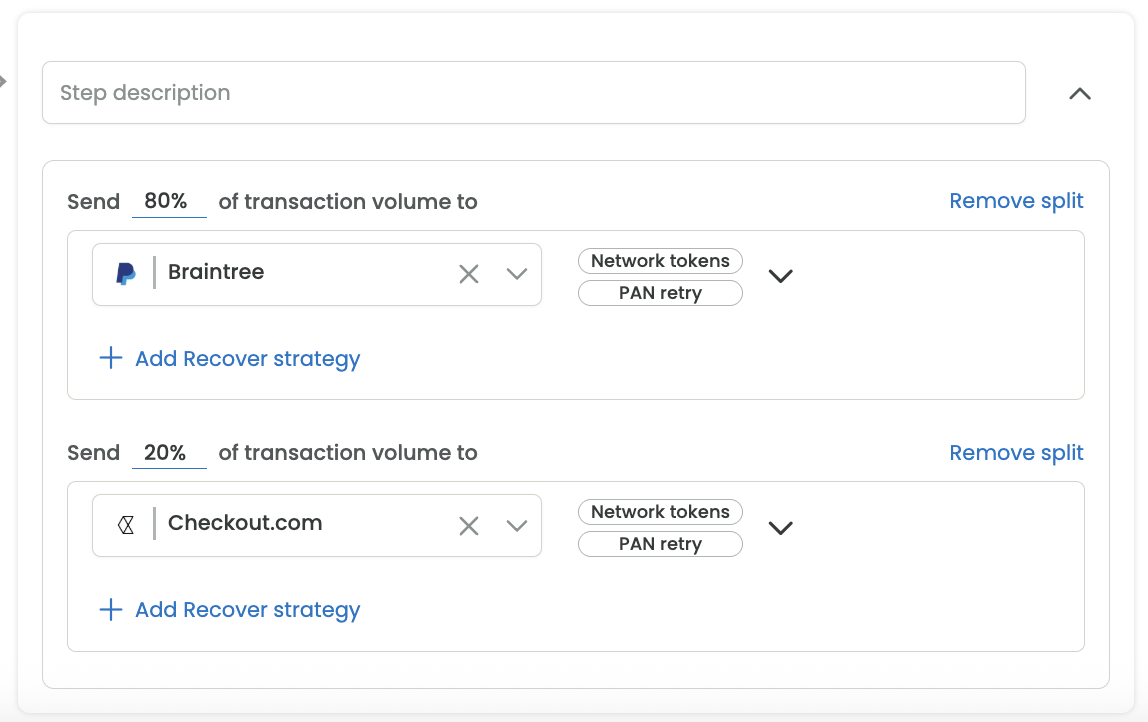
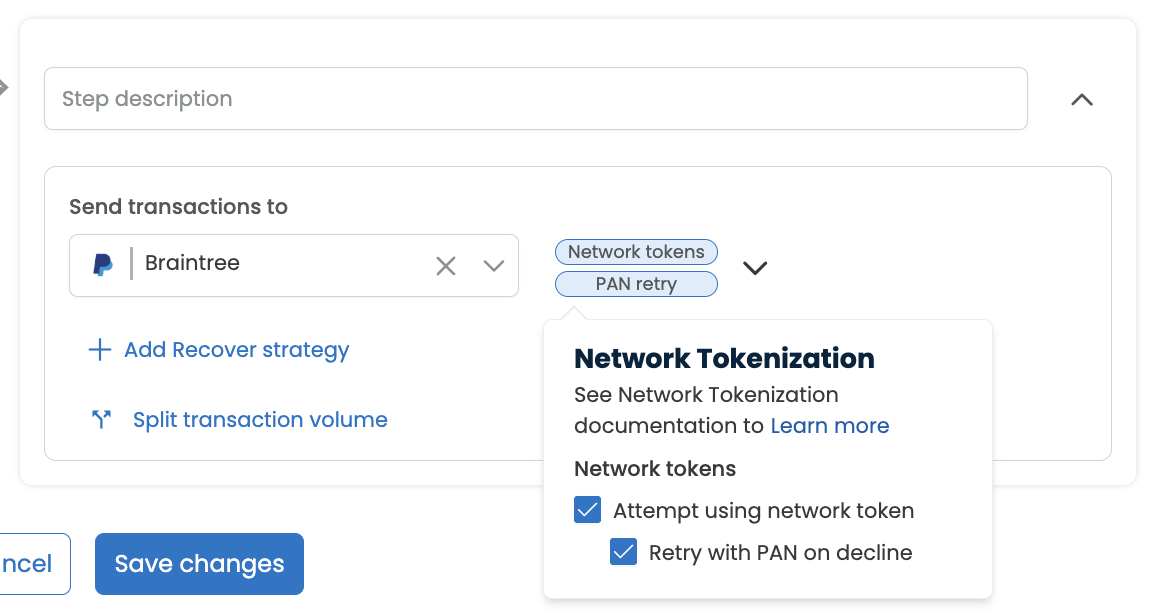
The volume split feature uses a random number generator to allocate transactions to each gateway based on the specified percentage. For smaller transaction volumes, you may notice minor variations between the actual and desired split due to the probabilistic nature of the volume split mechanism. As the transaction volume increases, these variations will decrease, providing a more accurate distribution.v. [optional] If Advanced Vault is enabled on your environment, enable Attempt using network token to attempt using a Network Token on the transaction when available. Some gateways require additional configuration before initiating transactions with network tokens via Spreedly. Ensure the documentation is followed to prevent failed transactions with the gateway. Enable PAN retry by selecting Retry with PAN on decline to reattempt the transaction on the same gateway if a Network Token was attempted on the previous transaction and fails for any reason. If reattempted with PAN, no additional API usage costs will occur.
-
vi. Select Save changes to save the workflow.
-
View Workflow token
-
After selecting Save changes, a Workflow key is generated and can be used as a
workflow_keyvalue in your API request.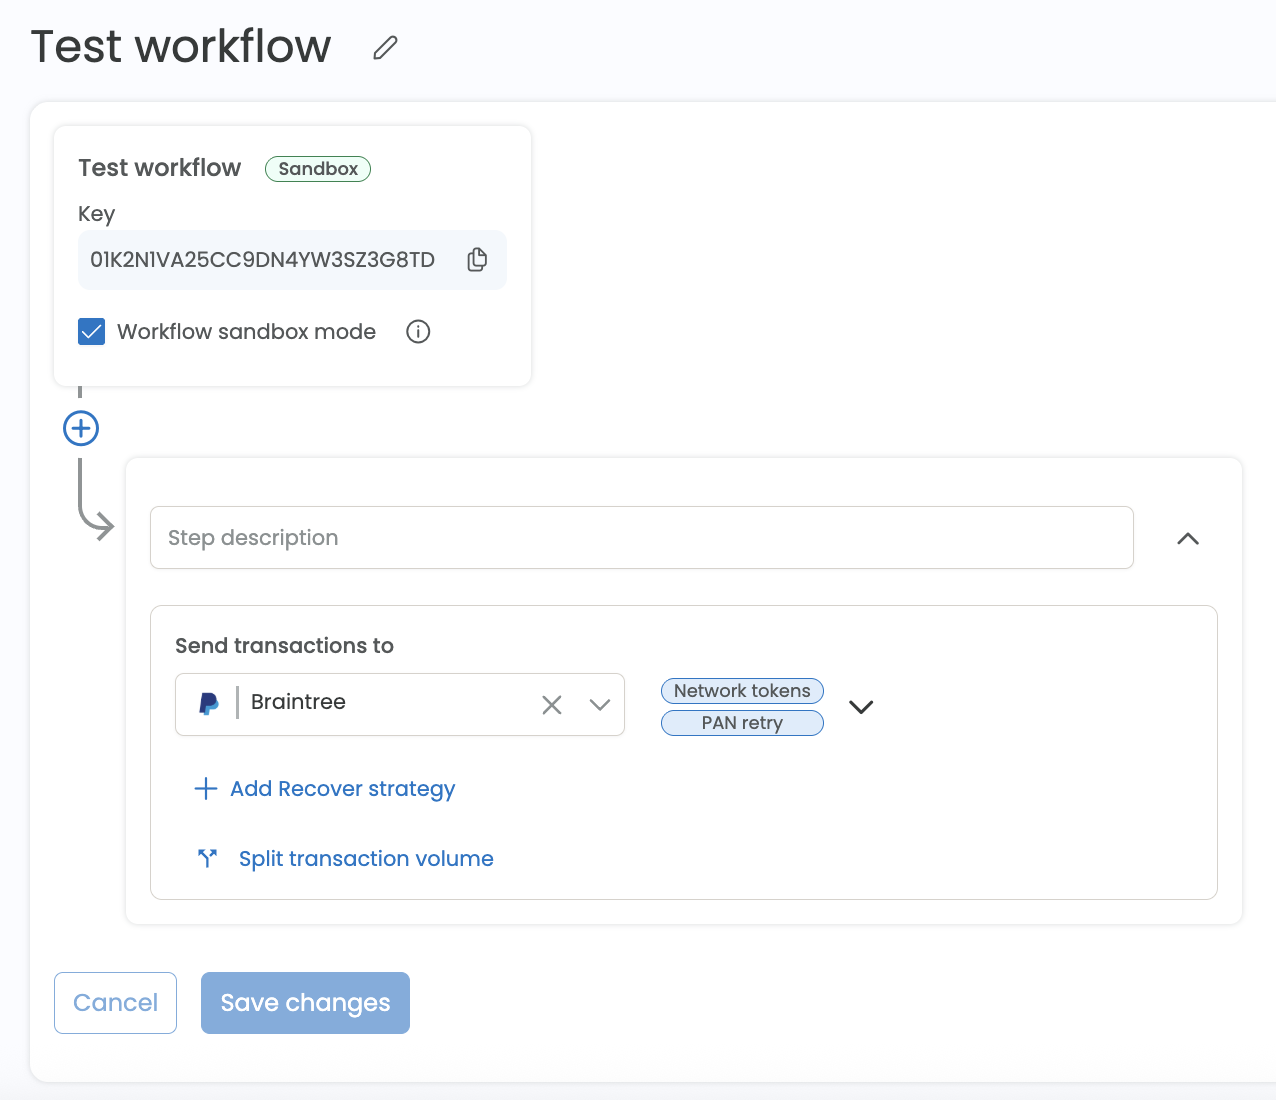
If this is the first Workflow created within your environment, it will automatically be set as the Default Workflow. The Default Workflow can be used in place of aworkflow_keyvalue in your API request. See step 5 for more details on Default Workflows. -
-
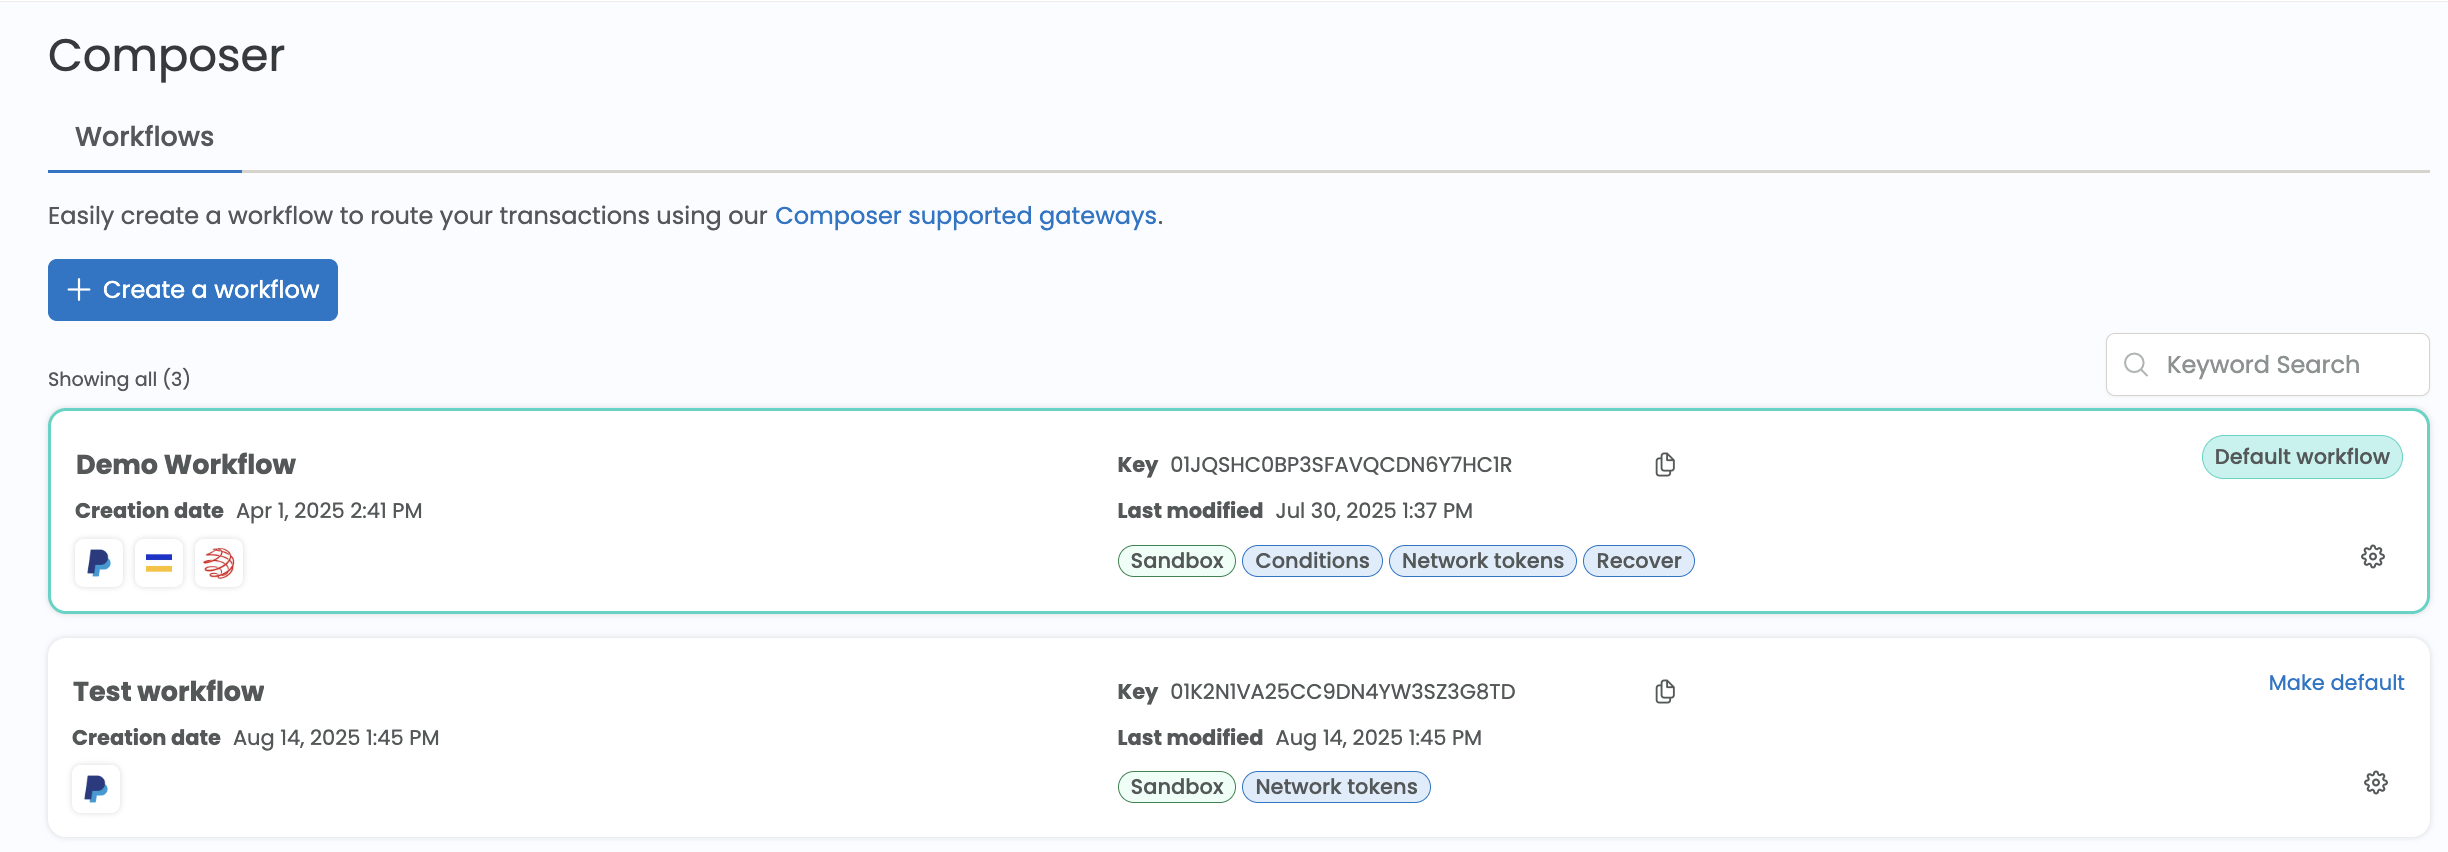
View Workflow List
- Navigate to the Composer page to view all Workflows within your environment. Easily create a new workflow from this page.
-
Update the Default Workflow
-
If you have more than one Workflow within your environment, update the default workflow by selecting the Make default button. Not specifying a
workflow_keyvalue in the API request will result in the Default Workflow being used. Using the Default Workflow can help to reduce engineering time spent updating theworkflow_keyin the API in some business cases.
Once a workflow is updated to the default, API transactions with default Workflow designations will immediately be routed to the new workflow. -
-
Update a Workflow
-
Select the gear icon located on the Workflow card to update a workflow.
-

Update the Workflow name, gateways and/or volume split. Select Save changes to update the workflow.
Once your changes are saved, API transactions with that Workflow key will immediately reflect the workflow changes. -
-
Delete a Workflow
- Navigate to the workflow and select the Delete workflow button in the lower right corner of the page.
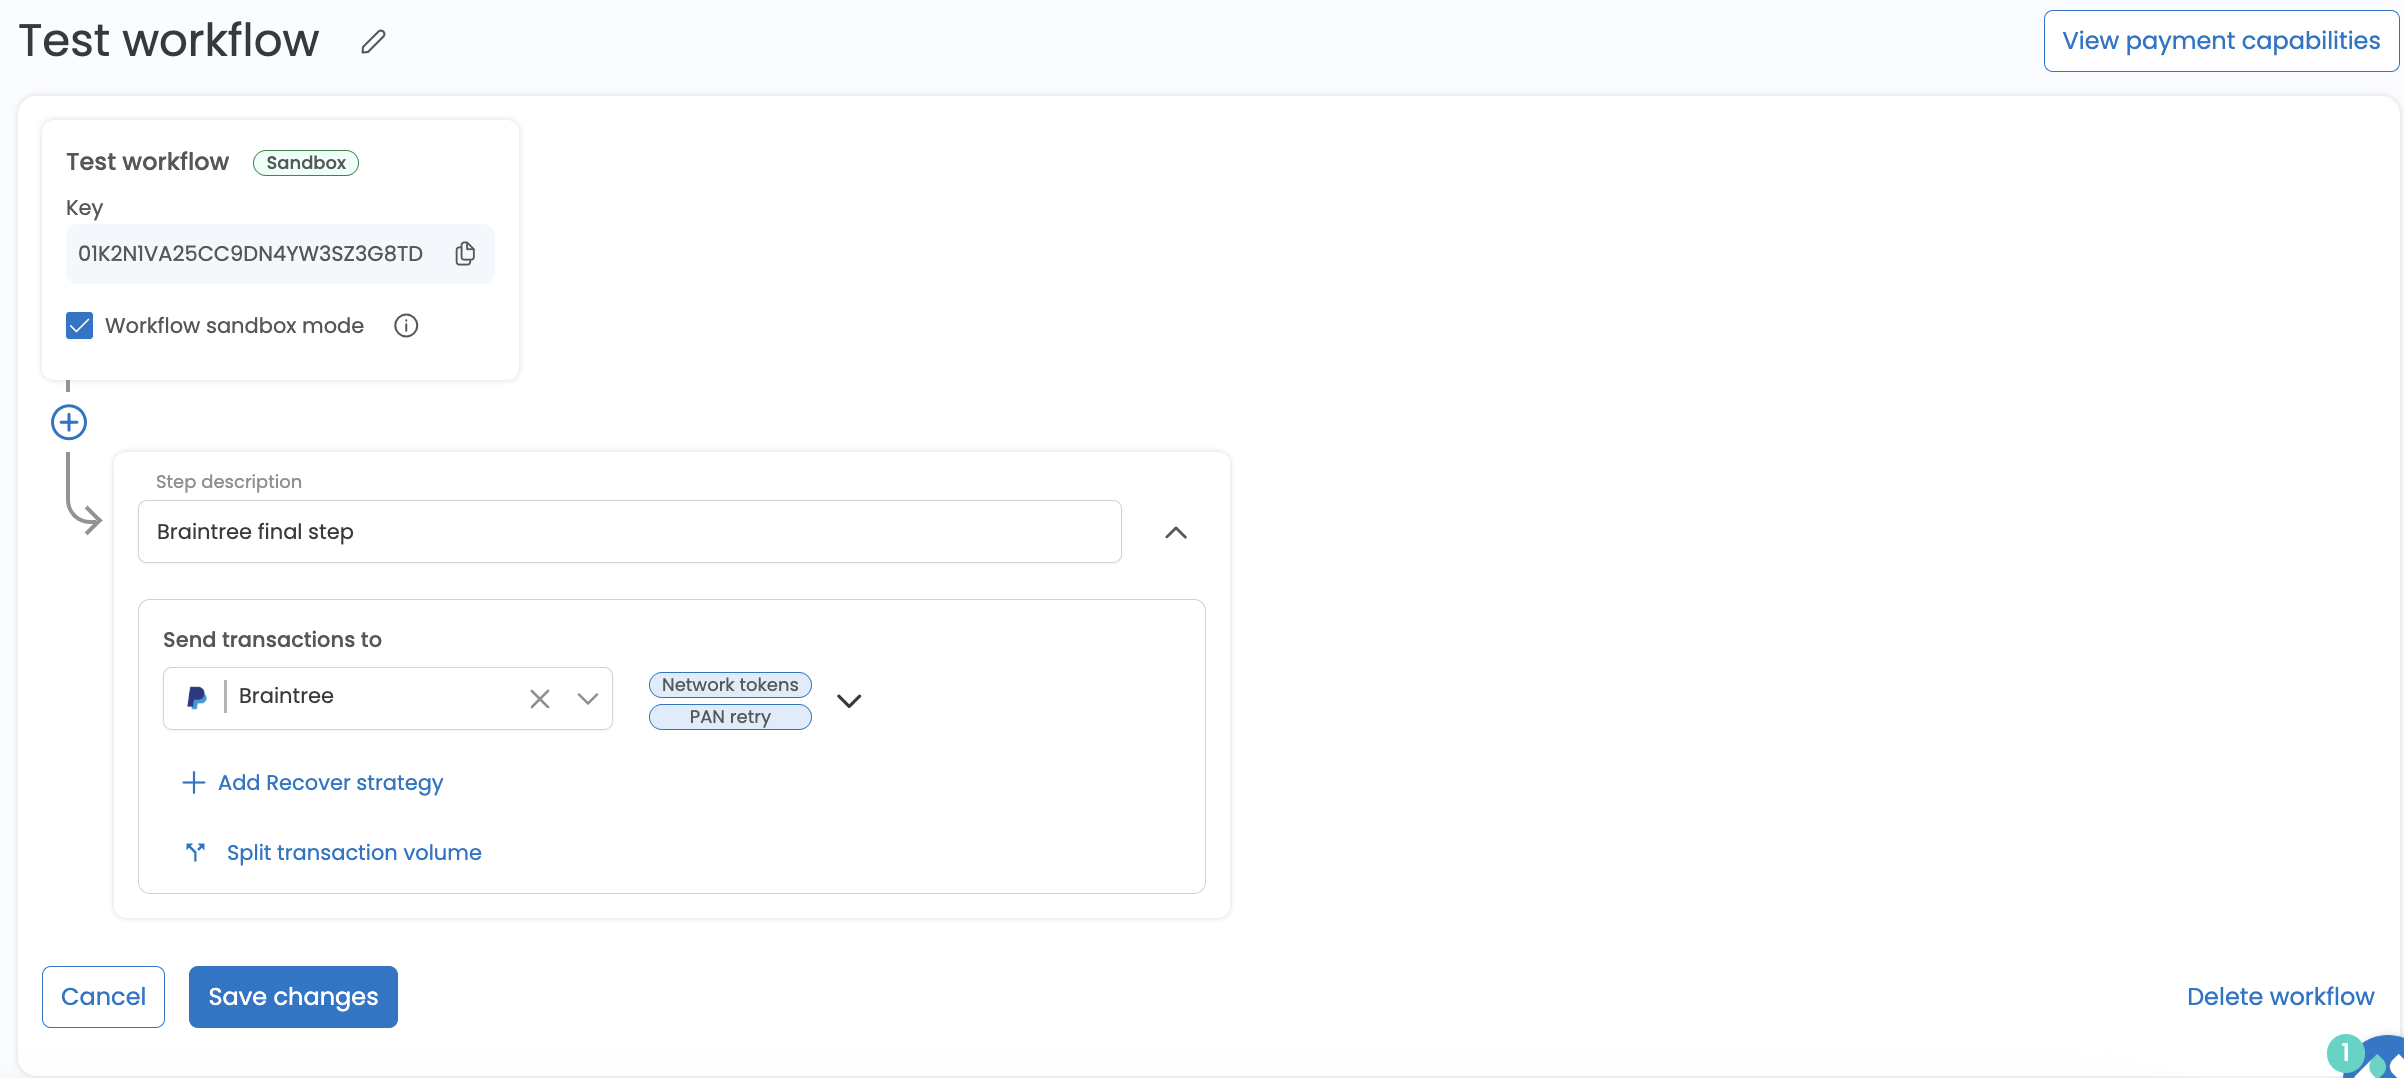 Deleting the workflow will remove the Workflow key and delete any rules or routing that are associated with the Workflow. Delete workflow will be disabled if it is designated as the default. You will need to change the default workflow in order to delete the Workflow.
 -
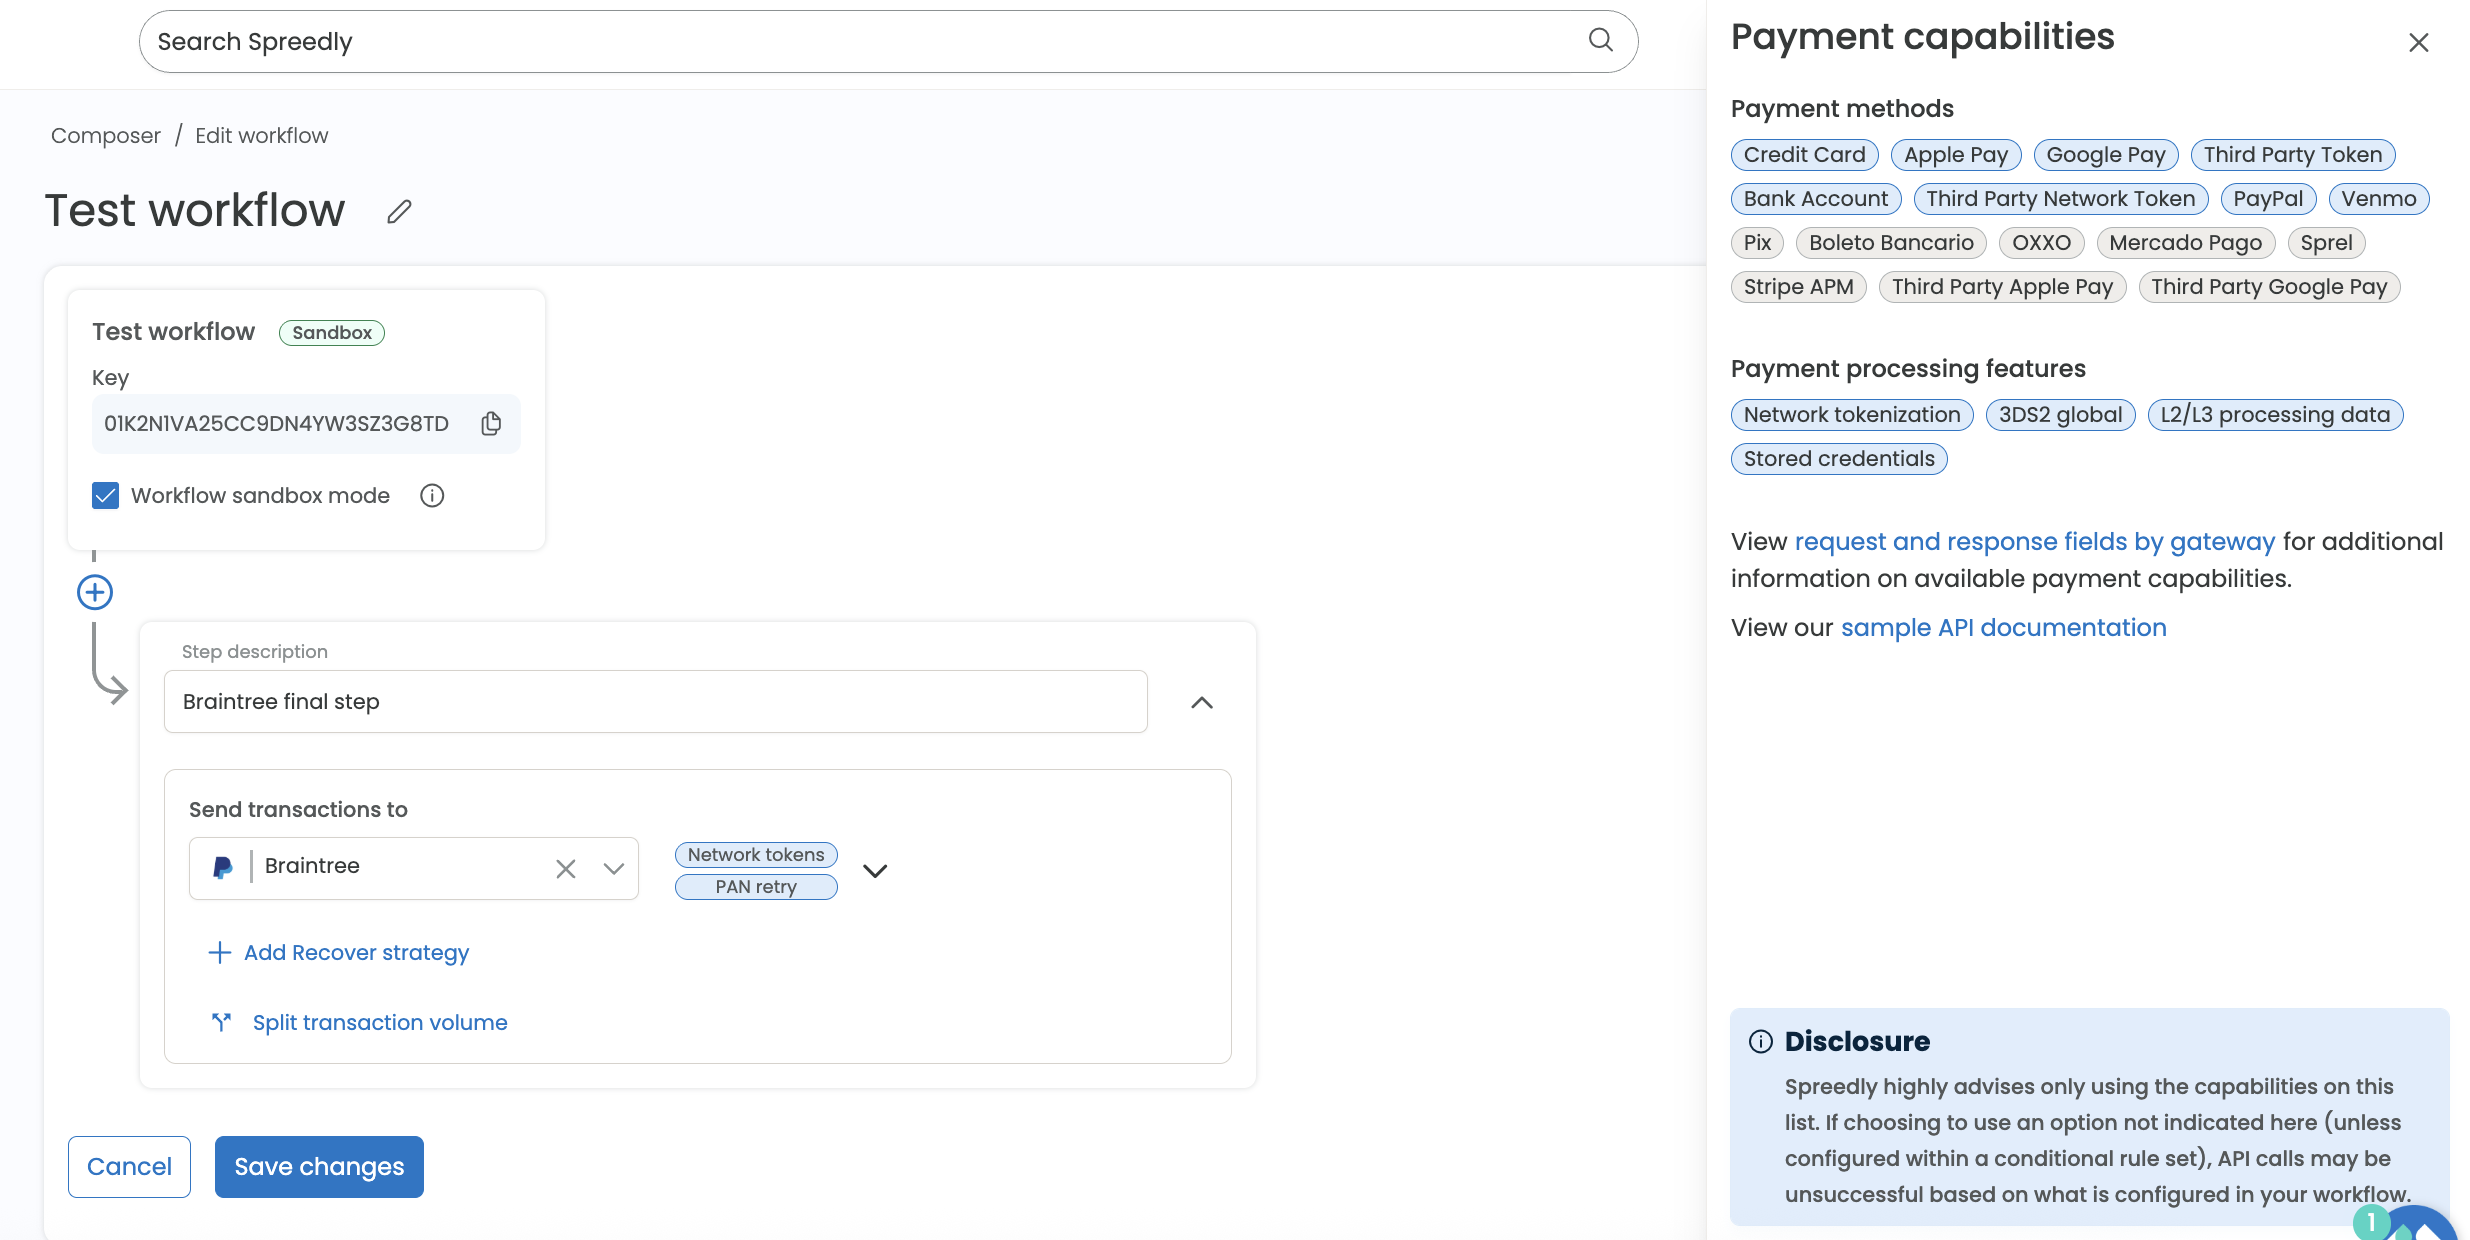
View Payment Capabilities in Workflow
- View the payment methods and payment processing features available based on the gateway types selected dynamically in the Workflow by selecting View payment capabilities. If at least one gateway selected in the workflow does not support a payment capability, the capability will be disabled in the UI.